
Cogmind New Player Strategy Guide
Tips and tricks to get your first Cogmind win
Major-spoiler free! This guide is intended for Beta 13+. Last updated May 2024.
Also in this series: The Heavy Combat Guide.
Fundamentals for Newbies
Help! I'm Lost!
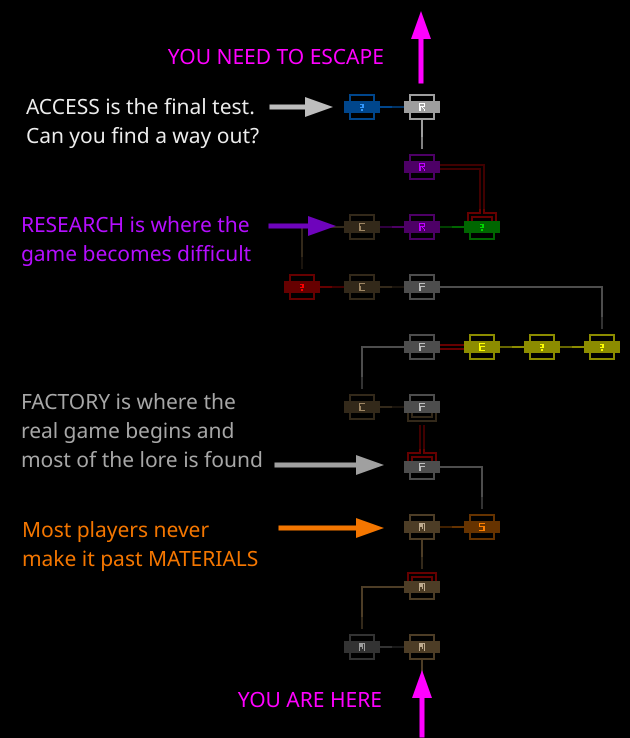
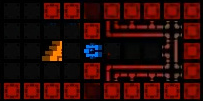
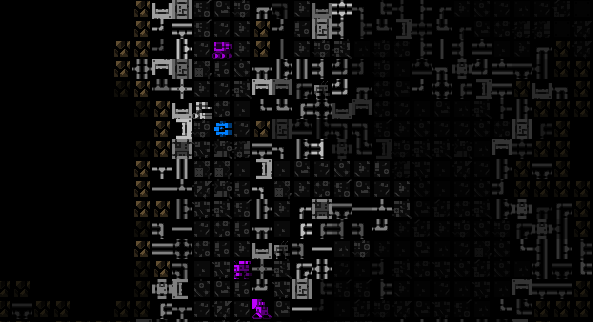
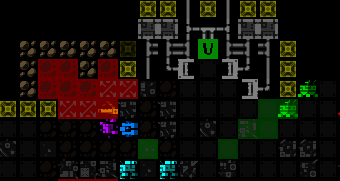
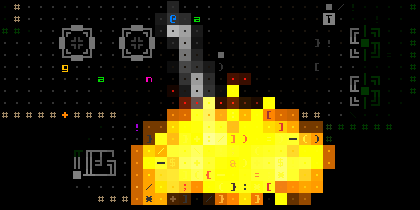
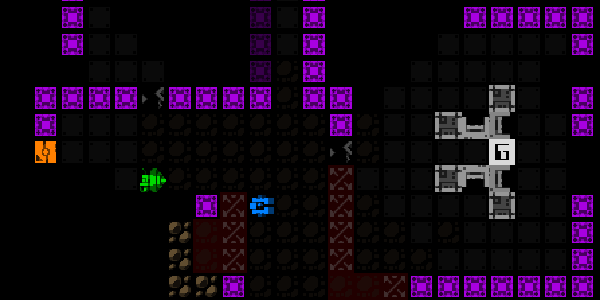
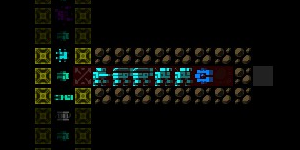
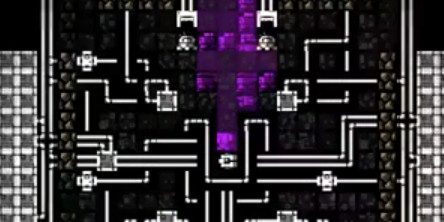
You are at the bottom of a 10-story robot factory called 0b10. Your goal is to escape to the surface.
On each floor, you need to find an exit and leave to make progress. Exits will either:
- Lead up to the next level
- Lead to "side branches" where all the fun stuff is.

There are 4 major sections of the complex:
- Materials - Where it all begins. Low difficulty level and no long term consequences. Maps are small and there are many exits.
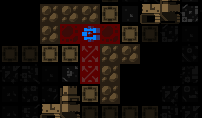
- Factory - Where the "real game" begins. Very large maps. Extermination squads will start tracking you. Many side branches provide fun opportunities.
- Research - Tight, twisted maps full of patrol squads and sentries. Very dangerous. This is where the best items in the game are hidden.
- Access - A single, large, open map that leads to victory. Can you find the exit to the surface?
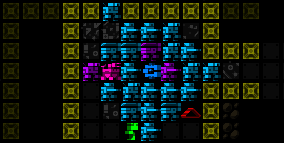
Press BACKSPACE to see a map of where you are.
User Interface Overview
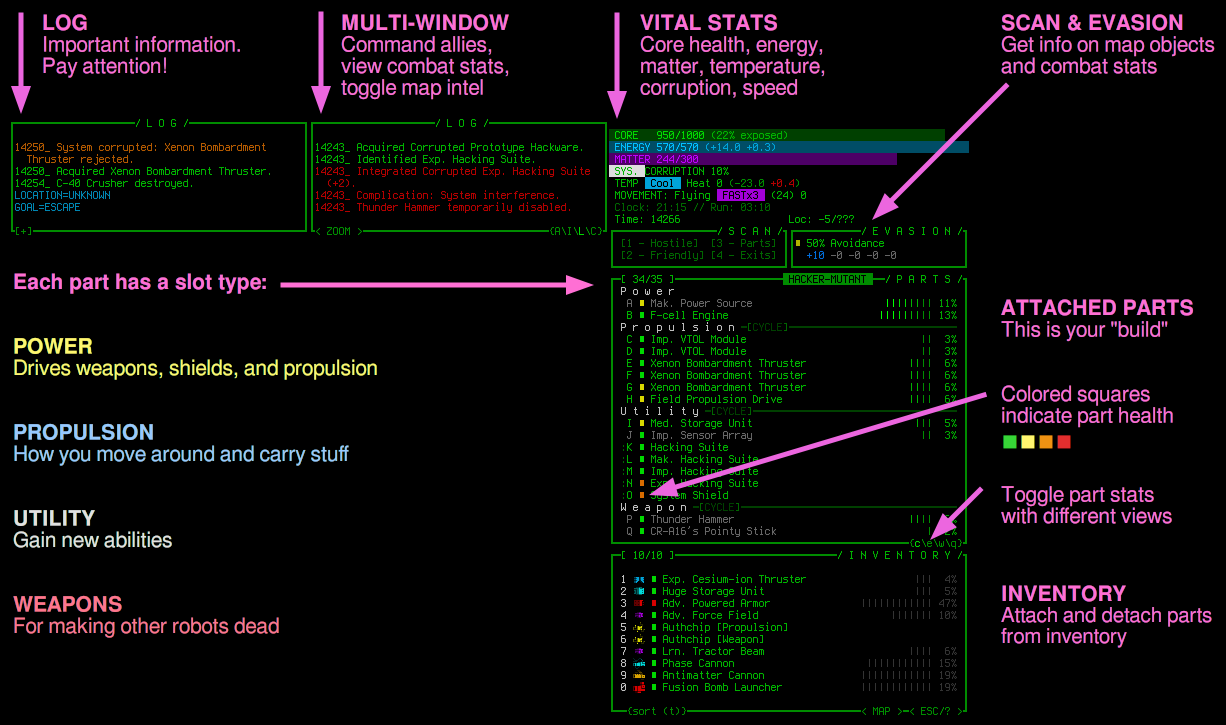
What Makes a Robot
- You have a core with hitpoints. When you take enough damage to the core, you die. That's game over, man.
- Your core gets more hitpoints every time you evolve by travelling up one floor.
- You can attach all kinds of parts to alter yourself.
- Parts provide coverage which protects your core. Let parts take damage instead of your core.
- Attach propulsion to allow you to move and carry stuff.
- Attach weapons to fight bad guys.
- Attach utilities to alter your functionality.
- Attach engines to power all the other toys you have on.
- Learn more.
Top Keyboard Shortcuts
You can play entirely with the mouse or the keyboard, but knowing just a few keyboard shortcuts will make the game much easier to play.
- A - Attach a part directly. It will auto-upgrade damaged and obsolete parts of the same type.
- G - Grab a part and put it in inventory. Parts auto-upgrade if inventory is full.
- F - Fire weapons. Press once to target, press again to shoot.
- TAB - Cycle targets to shoot
- 3 - Label all items on the ground.
- 4 - Label all known exits.
- ; - Toggle active propulsion. Cycles between different types.
- ' - Toggle active weapons. Cycles between different types. Handy for enabling launchers.
- ESC - View the main menu, help, documentation, stats, and achievements.
- ENTER - Focus map on Cogmind. Also cycles view between drones if deployed.
- BACKSPACE - View the world map.
- Shift-Alt-P - Go naked. Instantly drops all attached parts. Use this in emergencies.
- Shift-Ctrl-Arrow - Force melee attack / Force ram. Handy for digging and whacking bots with melee weapons.
There's a gajillion more hotkeys for you to explore in the in-game help menu.
Watch Others Play
Watching other players is the best way to improve. Check out players on Twitch and YouTube:
Things to See and Do in 0b10
Cogmind isn't just about winning. It's about exploring and having fun. How many of these things have you done?
Make an ally
Launch a recon drone

Rewire a robot
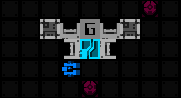
Enter a Garrison
Repair a broken or damaged part
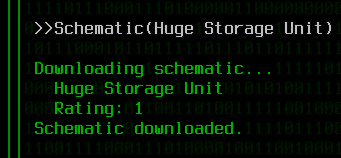
Get a part schematic from a scanalyzer or terminal
Print something in a fabricator
Use a RIF installer for robot hacking
Hack a robot with a datajack
Fall down a Waste Chute
Discover a secret cave on -10
Gain a "temporary slot"
Use a secret trojan terminal command
Reprogram a bomb trap for personal use
Discover a secret hideout

Install "FarCom"
Discover a robot sanctuary
Break allies out of jail
Find a dubious Oracle

Find where Behemoths and Heavies are built
Trigger "High Security"

Trigger a floor sterilization
Visit a DSF loot closet
Meet a thief in the Storage depot
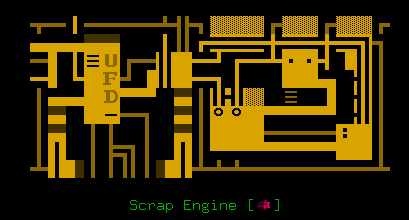
Make parts with a Scrap Engine
Hijack a cargo convoy

Discover what's in the Deep Caves
Visit a secret bio-research facility
Find a hidden superweapon testing area
Discover your true identity
Blow up a network datacenter

Meet a powerful army commander

Talk to an ex-Human

Figure out what Revision 17 is up to
Find a secret data archive
Discover who runs the 0b10 facility
Teleport through space
Find a spacelab
Eat a blue thing
Nuke the site from orbit
Strategy Tips
RTFM
Documentation is good
This guide is not a replacement for reading the manual that comes with the game. The entire thing is available inside the game itself, or offline in .txt format. It explains everything in meticulous detail. Read the manual online here.
Alert Spiral
Stop shooting everything
There is a background stat in the game called "alert influence". Killing bots and blowing stuff up raises alert. When alert levels increase, the complex will start sending out more enemies to your location, causing you to fight more bots, causing the alert level to increase even more. Eventually you die from "alert spiral". Avoid alert spirals by avoiding unnecessary combat and not triggering investigations from tampering with machines too much. There are also ways to specifically lower alert levels by hacking terminals or by simply leaving the floor.
Need for Speed
Run!
The object of the game is to escape, not to shoot everything. A heavy combat approach is more difficult than simply avoiding combat. New players often stand in place and fight to the death when they could just as easily walk away! You'll have an easier time if you spec into faster propulsion types (flight/hover) and avoid combat when possible. Use an ECM Suite to make enemy bots lose your trail faster when you run away.
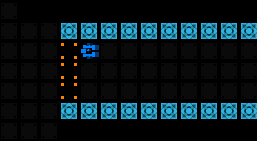
Finding Exits
Know before you go
A major hangup for new players is not being able to find an exit. You can get help by hacking terminals and looking for "Access Branch Locations" and "Access Main Exits". Terrain scanning and processors can help you map the floor as you go. Sending drones out with the "explore" command can very quickly locate exits. Hacking watchers with RIF and a datajack can get you their map data. Hacking terminals for Zone Layouts can reveal exits you may be right next to without knowing it. Picking up derelict logs in caves can instantly show you exits as soon as you enter the map. You may also deduce exit locations by watching bot traffic. Many enemies come from and path to exits. Sentries and Heavies often camp on top of exits, so look for them with sensors.
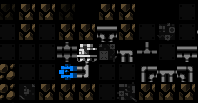
Non-Combat Bots
Help from our little green friends
They're a nuisance, but they will also provide you with many basic level parts in emergencies: wheels, engines, sensors, storage, etc. If you find yourself in dire straights, whack some green bots. Recyclers also carry matter, Tunnelers carry terrain scanners, Watchers provide sensors, and Operators have hackware and corruption utilities.
Choke Points

Use doorways to your advantage
Don't fight out in the open and let everyone shoot you at once. Instead funnel groups of enemies into narrow corridors or fight them in a doorway. Bots will clog the doorway while they take shots at you in a nice, orderly, single-file way. Read the more in-depth article on combat tactics here.
Find Storage First
Storage defines your build
Your first order of business at the beginning of the game should be to find adequate storage utilities for the kind of build you aim to go with. Don't leave Materials until you have the storage you need. Small, Medium, and Large options are found in standard stocking rooms on the first 2 levels. High-Capacity storage or larger units are frequently found on the floor.
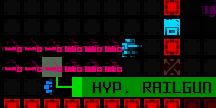
Grab a Launcher
The anti-swarmer weapon
Try to find a launcher weapon as soon as possible. This helps you quickly dispatch swarmers and groups of enemies.
Backup Wheel
Emergency propulsion
Consider carrying a backup wheel in inventory. If you find yourself in a situation where all of your propulsion is lost and you can't move, a single wheel can carry you to safety.
Infowar Utilities

Knowing is half the battle
Many utilities give you information which helps you find exits, find loot, avoid enemies, and hack machines. The more you know about your environment, the more effectively you can make progress, and less need you will have for weapons. Sensors + Signal Interpreters detect robots out of visual range, Structural Scanners, Terrain Scanners, and Terrain Scan Processors reveal the map, and Machine Analyzers reveal nearby machines. Also try out 0b10 Decoder Chips to find nearby points of interest, Seismic Detectors to see movement, and visual sensors that improve visible range.
Hacking
Make mischief with machines
All of the interactive (colored) machines are available for hacking. This lets you do all kinds of fun stuff: download info, map the room, build parts, build robots, uncover traps, lower alert levels, etc. Machines display a number of randomized direct options you can try for. There are also manual commands you can enter with the 'z' option if you know any. Manual hacks can be discovered by exploring the game. Most will work for every game after you find them. Increase your chances of success by equipping hacking suites (offense) and system shields (defense), by enlisting Operators as allies, or by smashing Operators and stealing their data cores. Equipping silly numbers of hacking utilities lets you cause maximum mischief.
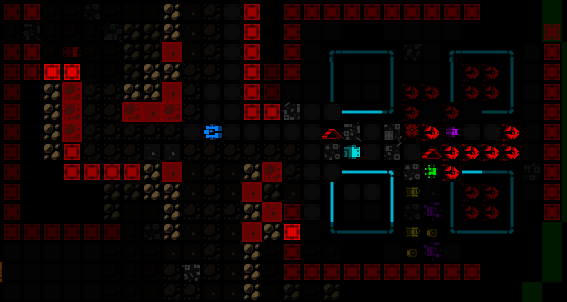
Exterminations
Programmers are coming...
Starting with the first Factory floor (-7), you will periodically be targeted by Extermination Squads (AKA "Programmers"). These enemies can pinpoint your location regardless of what utilities you are using. You can't avoid them, but you can hack terminals to get them recalled ("Recall Exterminations"). Programmers are weak to kinetic weapons if you need to end the encounter quickly.
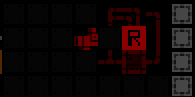
Mind the Garrisons
Don't fight near garrisons!
Garrisons are where the bad guys come from. If you cause a disturbance in the vicinity of a garrison, local bots can ping the garrison for help and reinforcements will be dispatched. This means you should avoid fights near garrisons at all costs. They will send a never ending stream of reinforcements. You can prevent this by sealing the garrison door or by simply smashing the garrison.
Play Defense

Armor protects your squishy parts
To protect your vital parts, wear armor! Armor is a big chunk of steel with high coverage. It soaks up hits instead of letting your "good parts" get hit. Shields use energy to block damage directly. If you're wondering around without armor or shields, then you're basically a piece of tissue paper waiting to get shredded. Armor is also a great item to get repaired at repair stations. This effectively gives you free hit points.
Keep Up With Technology
Grab new loot, dump old junk
Each level of the complex you move up, the available technology gets better. Eventually you will need to let go of your old gear and look for newer parts to deal with more difficult enemies. Make a goal of keeping your build as cutting-edge as possible before leaving the floor. Otherwise you will be unprepared to handle the next floor.
Watchers and Operators
Avoid getting spotted by taddle-tells
These are the reconnaissance bots of the complex. Watchers will ping any nearby combat bots for help if you get spotted (as evidenced by a flashing circle). Operators are assigned to specific terminals and will report you if you are spotted. They will run back, lock the terminal, and call for immediate backup. You can attempt to shoot them or shoot the terminal before it is locked down.
Allies
Literally make friends
Cogmind can be assisted by various allies. You can find allies by accident, manufacture allies in fabricators, reboot combat bots as allies with RIF and a datajack, and rewire bots that have been shut down by EM weapons. Some bots can be found shut down heading to waste chutes for disposal, or put away in storage rooms.
Digging
Make your own shortcuts
Avoid getting spotted by digging through walls instead of walking down broad hallways like an idiot. Use a melee weapon (Shift-Ctrl-Arrow) or cannon to cut through walls and earth. Destroying wall tiles raises the alert a small amount, but not nearly as much as making a scene out in the open. Some walls and barriers are extra strength to resist digging. Beware that digging through multiple tiles risks cave-ins which can be extremely damaging.
Frequently Asked Questions?
Where am I suppose to go?
Up! Look for staircases that lead to the next floor. You win the game by ascending to the surface.
What slots should I evolve
Propulsion and Utilities Only take power or weapon slots when you know you need them.
How do I heal myself?
By going up. Your core will expand and full-heal whenever you move up to a new main floor. There is no other way to heal your core. There are no heal potions in Cogmind.
Why am I being attacked by "programmers"?
Extermination squads begin on Factory/-7. Periodically an "Extermination squad" (Programmers) will be sent to your exact location after you first reach Factory. They will continue to plague you for the rest of the game. You can either fight them or try to recall them at a terminal ("recall extermination").
What are "assaults"? What did I do wrong?
Your punishment for being bad. Assaults are sent to your exact location after you have raised the "Alert" level too high by making a disturbance.
What is "Alert"?
It's a measure of the trouble you've caused. If you cause more trouble, the game will start to send out assault carriers to your location. Alert goes up whenever you get spotted, kill robots, damage walls, and blow up machines. Alert influence goes down slowly over time and sharply when moving to a new map.
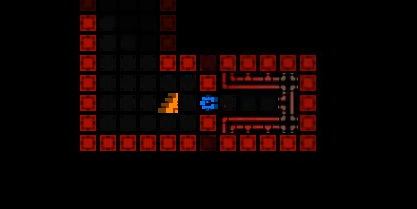
What is the point of Mines and Caves? They seem empty and dangerous.
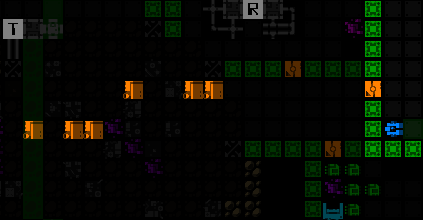
They hide special places and rare encounters. Mines (depths -10 to -8) can have a number or special enounters and is home to both Subdwellers and the Exiles. Caves (depths -7 to -4) have secret reward locations at the end of them. Be sure to explore all the way to the end (leftward).
How do I stop overheating?
Equip cooling. This includes heat sinks and cooling systems. You can also focus on kinetic weapons which are relatively cool already. Thermal weapons produce a lot of heat.
I keep running out of matter!
Get matter from robots. Particularly green "recycler" robots will provide a large amount of matter when killed. Be sure to pick matter up whenever you see it. Keep extra matter in reserve with Matter Pods.
I keep running out of energy!
Evolve power slots or take a battery. Batteries let you store power and use it instantly by equipping it or dropping it on the ground beneath you.
What does corruption do? Should I take these corrupted parts on the ground?
Corruption causes annoying side effects. This includes misfires, dropping parts, overheating, forgetting part IDs, etc. If you get to 100% corruption, you die. You obtain corruption from equipping corrupted parts, getting smashed by impact damage, and shot with EM damage. Corruption is reset to zero on each evolution.
How do I stop getting swarmed by robots and shot to pieces?
Use sensors. See them before they see you. Prevention is the better than confrontation. Avoid unnecessary combat by equipping various kinds of sensors to detect enemies. If you find yourself fighting a large group anyway, use launchers to blow them all up at once.
Why am I so slow?
You are carrying too much stuff. Storage units are particularly heavy. Do not equip larger sized storage units unless you have the carrying capacity to handle it. Check your weight in the top left corner of the parts window. Try to stay underweight for the best speed.
What propulsion should I use?
They all have strengths. For new players, it is recommended to go with treads in Materials, and flight units after you reach Factory.
How do I not die during Mines infestation?
Hide or fight back. Find a corner to hide in. If that's not possible, plan for the worst: bring treads, armor, cannons, and grenades to fight the Assembled. Grenades are good against large groups of opponents. Treads and armor give you integrity and staying power. If you encounter missile-launching Demolishers, kill them as fast as possible. Don't run. There is no running from them.
Builds
You can make a "build" out of any parts you want. There are no hard rules. Here's a few ideas:
 Flight-Hacker
Fast and light mischief maker
Runs on flight and sometimes hover. Focuses on propulsion and utility slots. Flight hackers equip an unusual number of hacking utilities to be able to milk interactive machines for any value they can provide. Flight hackers will hack terminals for part schematics, build parts at fabricators, find exits at terminals, and make an easy game for themselves by lowering alert and dismissing investigation squads. Flight hackers also make extensive use of sensors to avoid detection and get maximum intel.
 Blaster
Energy weapon specialist
Combat bot focused on energy weapons. Energy weapons require additional cooling systems and benefit from batteries and sometimes additional engines. Blasters work well in short to medium combat engagements, but have trouble when the energy runs out. Hover, legs, or treads work well with this build.
 Gunslinger
Kinetic gun specialist
Combat bot focused on kinetic guns and high weapon slots. Fires volleys of ONLY guns to enable "gunslinging" which can retarget weapons when a target is destroyed. Good for protracted combat engagements and killing things very fast and at long range. Gunslinger builds depend on matter to fight, so need matter pods or tractor beams to keep supplies up. Hover, legs, or treads work well with this build, but treads work especially well because of their innate recoil reduction against kinetic weapons and siege mode capability. Gunslingers greatly benefit from weapon cyclers and targeting computers to maximize damage. Energy guns can also be used for gunslinging, but kinetics tend to stack better.
 Hauler
Cargo carrying general purpose build
A semi-combat build that focuses on wheels and overweight storage. Haulers survive by carrying backups of backups of everything. They are generally slow and inefficient, but can last a long time. This is also a good defensive build when heavily laden with armor.
 Ninja
Ninja
Stealth assassin
A stealth build with quick-kill capabilities. Ninjas will usually run on hover or advanced flight units. They prefer not to get into unnecessary combat, but can quickly disable a few enemies by using either focused melee attacks or high-critical kinetic weapons. Ninjas equip infowar utilities to avoid combat. Ninjas cannot sustain prolonged combat and will prefer to run away if possible, using an ECM Suite to give enemies the slip.
 Sniper
Long-range kite
Similar to Ninja but focused on long-range attacks and kiting maneuvers. Snipers will prefer to shoot bots out of their own attack range to prevent opponents from being able to return fire. Specialty snipers may use kinetic and long-range energy cannons for maximum kiting potential. Snipers are more focused on combat utilities to put down enemies fast: targetting computers, armor analyzers, target analyzers, and core analyzers. Vision utilities are also helpful to see enemies before they can see you.
 Programmer
EM weapon specialist
A semi-combat bot that focuses on EM weapons. Runs almost any type of propulsion. Equips batteries, heat sinks, and 3-4 EM weapons to be able to corrupt bots at range. Bots that are not destroyed are significantly disabled and have difficulty fighting back. Programmers may also carry a datajack to reboot bots that have been shut down by EM disruption.
 Bot Hacker
RIF specialist
A RIF-enabled build that hijacks and reprograms other robots. This build specs almost entirely into RIF couplers, data jacks, and ally-assist utilities. Bot hackers may repeatedly enter garrisons to acquire more RIF abilities and couplers. Remote shields and tactical coordination suites are especially useful on this build. Weapons and speed are a low priority for the Bot Hacker because allies will do most of the fighting for you.
 Tank
Tank
The all-out-war build
Focuses on treads, armor, and weapons, but especially launchers. This is the most obvious and appealing build for new players, but also the most misleading and difficult to sustain. Tank builds are slow and cannot run from fights. This summons endless enemy reinforcements. Tank builds need to carry ample storage and backups and be ready to overcome overwhelming odds to survive.
Evolutions
Each floor that you move up, you get to evolve 2 new slots. How do you decide?
 Power
Power
- Don't evolve a second power slot until mid-game.
- Generating more power than you need is wasteful and won't help you do anything.
- Most players end the game with 2 and sometimes 3 power slots.
Propulsion
- Early propulsion slots help you move faster and carry more stuff.
- Flight/hover players should focus on propulsion slots. Every additional flight unit makes you go faster!
- Use wheels if you want to avoid taking early propulsion slots.
- Treads players benefit from having slots in multiples of two (later treads are mostly two slot parts).
- Most players will have 4-8 propulsion slots by the end of the game. Flight players may have even more.
Utilities
- Utilities are the most in-demand slot type. Focus on utilities!
- Stealth and infowar players should lean heavily on utility slots.
Weapons
- An extra weapon or two makes the early game much easier.
- Don't take more weapons slots than you can support with matter, energy, and heat sinks.
- Most players take at least a third weapon slot by mid game.
- Combat-oriented players will end the game with 4-6 slots. Stealth players will stick to 2-3.
Propulsion
There are 5 different kinds of propulsion besides your built-in "core hover". Each one has benefits and drawbacks. Which ones you choose depends on your situation and your play style.
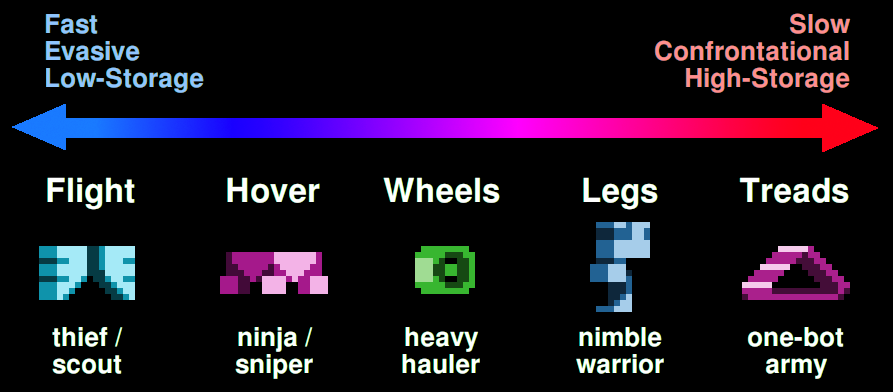
Flight
High speed minimalism
- Fastest.
- Can hop over other bots.
- Extremely fragile.
- Can't carry much.
Hover
High performance maneuverability
- Fast.
- Limited availability.
- Low integrity.
- Low-medium support
 Legs
Legs
The all-purpose propulsion
- Easily replaced parts.
- Dodging bonus while running.
- Good integrity.
- Kick bots out of the way.
- Medium speed.
- Medium support.
Treads
For heavy combat
- Tough.
- Siege mode.
- Run bots over.
- Maximum carrying capacity
- Recoil reduction
- Very slow.
- You get stuck fighting everything.
 Wheels
For big loads
- Low overweight penalty allows you to carry anything.
- Easily replaced.
- Medium speed.
- Very low integrity.
Core Hover
When all else fails
- Fast
- Always available
- Virtually no carrying capacity.
- Extremely vulnerable.
Weapons
New players should just read the class rating on a weapon and stick to the highest class ratings. After that, level up your game by knowing what each type of weapon is good and bad at.
Kinetic (KI)
- Long range
- Low heat
- More critical hits
- Weapons last longer
- Higher level kinetic weapons shoot through walls
- Requires ammo (matter)
- Recoil messes up your aim.
- Highly variable damage output
- Lower salvage potential from targets
 Thermal (TH)
- Reliable damage output
- Uses energy which magically recharges
- Targets can overheat, effecting their aim.
- Higher salvage potential from targets
- Energy takes time to recharge
- Generates self-damaging heat
- Weapons are destroyed easier.
Electromagnetic (EM)
- Messes up robots: tracking, targeting, engines, corruption.
- Targets can die to corruption.
- Targets can shut down and be rebooted as allies.
- Causes engines to explode.
- Causes corruption on salvaged parts.
- Massive heat output.
- High energy requirements.
- Weapons easily destroyed.
- Causes engines to explode.
 Explosive (EX)
- Massive amount of damage.
- Area-of-Effect damage good for attacking groups
- Easy to hit yourself
Guns
- Gunslinging lets you hit multiple targets if you fire ONLY guns in your volley.
- Easily replaced.
- Less damage than cannons.
- Easily destroyed.
Cannons
- Massive damage.
- Lasts a long time.
- Kinetic cannons can knock back enemies.
- Useful for digging through walls.
- Can only aim at one target.
- Very heavy.
- Resource hungry.
- Wasteful due to overkill.
- Kinetic cannons have low accuracy.
- Energy cannons produce extreme heat levels.
Launchers
- Great for fighting groups, especially swarmers.
- Messy. Easy to hurt yourself and allies.
- Literally blows your cover.
- Resource intensive.

 Melee
Melee
- Fast
- Lightweight
- Strong damage in a single hit.
- Increased damage from momentum.
- Ideal for digging through walls to sneak around.
- Little or no resource requirements to use. Great for backup.
- Can only swing one weapon at a time.
- Bad when fighting groups.
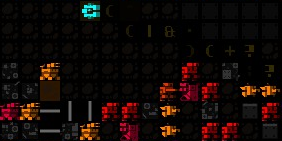
Robot Field Guide
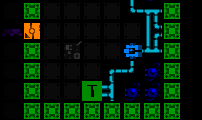
Learn to identify threats and opportunities when you see robots:
Watcher

Unarmed scout
Far-sighted scout that patrols a set route and pings local bots for help if it sees anything. Help only arrives if they are close enough to hear the watcher's distress call. If the watcher is out of range, no one will notice if you splatter them. Fast and hard to hit. Weak to EM.
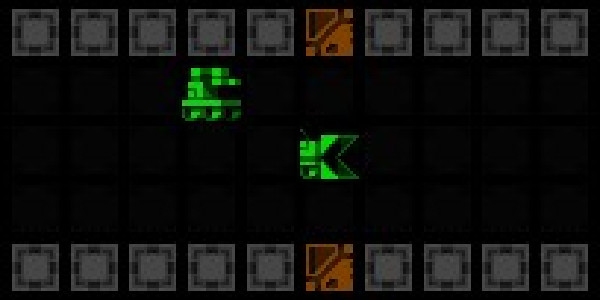
Grunt

Most common enemy
All-purpose enemy. No great strengths or weaknesses. Uses light energy weapons. Travels in packs on regular patrol routes. Don't let them gang up on you. Large groups of grunts can cause damage from excessive heat transfer. Take them out one at a time or run away. They quickly forget about you.
Swarmer

High speed nuisance
Armed with a single kinetic gun. Always travels in packs of 3 or 4. Very fast and difficult to outrun. Easily dispatched with explosives or EM weapons.
Sentry

Overweight and underpaid
A general-purpose light duty guard. Sentries carry mixed guns, light armor, and treads. They guard exits, junctions, and key locations. They will slowly but relentlessly give chase if you are spotted. Easily dispatched. Weak to EM.
Hunter

Stealth sniper
Invisible on most sensors. High hit points soak up damage. Carries 1-2 kinetic guns. Later models shoot through walls. Will relentlessly pursue you with recon drones. Usually travels in pairs; If you see one, look for the other. Weak to EM. Resistent to kinetic. Good source of higher-quality legs.
Programmer

Techno-exterminator
Called onto your exact location on a regular schedule. Cannot be evaded. Travels in groups of 1-4. They use EM weapons to damage and disrupt. They can clear corruption on allies, shoot down remote datajacks, and reboot or reprogram your allies. Weak to kinetic. Resistant to EM. You'll know they're coming if you see the alert "rogue bot found, programmers report to ...".
Brawler

Smashy! Smashy!
Armored melee bot armed with hammers. They wreck delicate builds by crushing small, sensitive parts with critical hits. Shoot them dead before they close range. Good source of armor and reinforced engines.
Duelist

Off with your parts!
Sword-wielding melee bot, similar to Brawlers. They will sever your parts off if they land a blow. Shoot them before they get too close.
Heavy

Area-denial guard dog
Heavies are designed to guard a position and not stray. They detect local movement and call reinforcements. Fires heavy kinetic cannons that blast off parts. Does very high damage at long range. Take them down as fast as possible or you may end up the loser. Weak to EM. Avoid if possible. High quality loot if you can kill them.
Cutter

Speedy disabler
Called by heavies as reinforcements. Fires a single grenade to mess you up, then moves in at ultra-high speed to cut you to pieces with saws. Cannot be outrun. Counter them with heavy explosives at range or guns up close.
Specialist

Many ways to kill you
Specialists come in a variety of unique builds, but could be considered a "Grunt++". Usually only seen in assault squads or reinforcements called by Heavies.
Imp

Kamikaze
Dives straight at you and attempts to cleave off your parts with melee weapons, dying in the process. Usually leads the charge from an assault carrier. Rarely fatal. Designed to disable you for followup brutality by teammates. Shoot them down before they close range.
Demolisher

Death from above
Fires explosive rockets and never gets tired of doing it. Usually travels in pairs. Kill them as fast as possible. They can very quickly destroy every part you have. They are fast and difficult to run from, so stand and fight. Rarely seen. Resistent to explosive damage, of course.
Carrier

Armored Robot Carrier (ARC)
Quickly transports groups of assault bots to your location. Deploys contents on being spotted or shot. If you see these, you have been very bad and are being punished. Shooting the carrier damages, but does not destroy, the contents.
Protector

Defensive ARC support
Unarmed support bot. Often accompanies ARCs and large squads. Throws a force field around local bots, reducing all damage they take from you. They can also shoot down rockets. You should usually execute this little guy before wasting shots on nearby protected enemies.
Operator

Taddle-tell nerdling
Operates a terminal. On spotting you, they race back, disable the terminal, and call reinforcements. Your job is not to get spotted, or to shoot them or the machine if you do. Operators carry hackware you might find useful. Very hard to hit.
Researcher

Enhanced taddle-tell
Researchers are not inherently hostile. You can walk around them without a problem. If you use a weapon in their sight, they become hostile, immobilize you with a stasis beam, and call reinforcements. Smile and be on your best behavior when in visual range.
Behemoth
Heavy-duty sentry
Heavily armed and armored. Usually lives in a wall niche and waits for little cogminds to walk by. Avoid if possible. Short term memory, poor sight, and very slow. Easy to run from. It's double-wide frame can't fit through tight corridors, but it will shoot through walls to get to you. Good source of treads and cannons. They make amazing allies. Late-game models are terrifying. Use critical hit utilities or EM weapons against them.
Serf

Sanitizing trip hazard
This bot's official purpose is to clean things, but its more practical use is simply to get in the way. Datajack them if you want to find waste chutes. They can sometimes be seen carrying shut down bots to the trash. Easy source of wheels and engines if you're in a pickle.
Engineer

(Re)Builder of things
Rebuilds damaged walls, doors, and floors. Extremely annoying if you are trying to dig through walls, but can be your savior if you have enemies chasing you. Hitting them while they are on the duty will call for reinforcements, so let them do their job. You can give them a distraction job by shooting a hole in a far away wall.
Excavator

Tunneling new spaces
Digs out new areas of the complex. They carry seismic sensors and terrain scanners, so it is helpful to smash up the ones that appear in the scrap pile where you start the game.
Hauler

Loot piñata
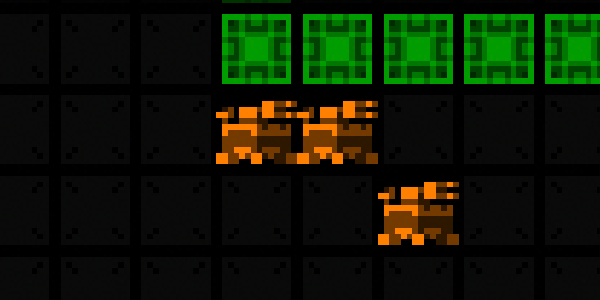
Carries parts throughout the complex. Often carries high-level prototype gear you can't otherwise get. Will call for reinforcements if harassed. Good source of storage utilities in a pinch. Yellow haulers ("Yaulers") are armed carriers with top-shelf toys, escorted by an entourage of death and destruction. Avoid them unless you are ready for a royal rumble.
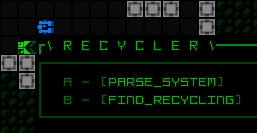
Recycler

Factory pack-rat
Collects discarded parts off the floor and carries them to the nearest Recycling Machine. Shoot them with a warning shot and they will run away and stop bothering you. Great source of matter. They also carry tractor beams.
Machinist

Robot repair bot
Works from a Repair Station and looks to repair other bots. If you can snag one as an ally, you can command them to "Aid" and they will repair your parts and your allies' parts up to half-integrity.
Alignments
As you explore the peripheral areas of the complex, you may encounter interesting bots that you can align with, or at least be influenced by. Many of these alignments are mutually exclusive or will have... interesting... effects on each other. Choosing to align or avoid alignments influences how you may wish to proceed through the game and may also grant special endings.
FarCom (Exiles)
Best for n00bs
The Exiles can be found in the early game in the Mines. Getting FarCom is the best option for helping new players get their first win. FarCom provides the best sensors in the game, and the Exiles let you pick a free toy from their toybox. FarCom makes most of the game easier, but also shuts you out of late game and extended game content.
Imprint (Zion)
Help from allies
Getting imprinted in Zion gives you the support of the Zionites. Afterwards, all green terminals in the complex will be overridden with direct connections to Zion which you can use to get special intel, summon powerful allies, and call for supply drops. Getting imprinted makes the basic game a little harder, but extends late and extended game options. Imprinting is mutually exclusive with FarCom.
Warlord

Warlord Forever!
Warlord's secret base is hidden in the Caves after the mid-game. Warlord wants to crush Main.C's forces and wants you to come along for the ride. Talking to Warlord does not give you any special abilities, but it does trigger special late game events. Warlord has some really cool toys you can use, and you might be able to get into his personal stash if you know who to ask. Warlord is sympathetic to, but not directly allied with Zion.
RIF
Robots pwned on demand
Get your Relay Interface Framework (RIF) installed by entering into any garrison and finding the RIF installer. Once installed, you will have the ability to hack other robots! Getting RIF also causes you to be seen as hostile towards Zion, Warlord, and others. Each garrison you enter has a different RIF installer and can grant you additional bot hacking abilities. If you want to RIF, you'll want to get a datajack and stock up on "couplers" found by whacking machines inside the garrisons.
CRM
It's the blue one
CRM is technology that . Getting CRM means and you won't . However, in times of great distress, will . It also lets you which can make certain late-game areas easier. The downside is that you pretty much everything.
Etc

There are a number of other colorful characters you can meet out on the fringes of the complex. They can greatly influence your run, but this is just a beginner's guide. Go find them yourself!